
Firewall VM Setup
Overview
This guide walks you through setting up a virtual firewall in Proxmox VE. While we'll use OPNSense in this tutorial, you can adapt these instructions for other firewall solutions such as:
- pfSense
- Sophos
- Fortinet
- Other software firewall distributions
Compatibility
This guide is tested with OPNSense, but the VM configuration steps are generally applicable to other firewall solutions with minimal adjustments.
Prerequisites
- Proxmox VE installed and accessible
- OVH dedicated server with additional IP address
- Basic understanding of networking concepts
Step 1: Download OPNSense ISO
Option A: Direct Download to Proxmox
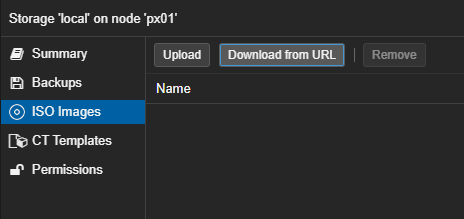
- Navigate to your node's ISO Images section in Proxmox VE:
- Visit the OPNSense download page:
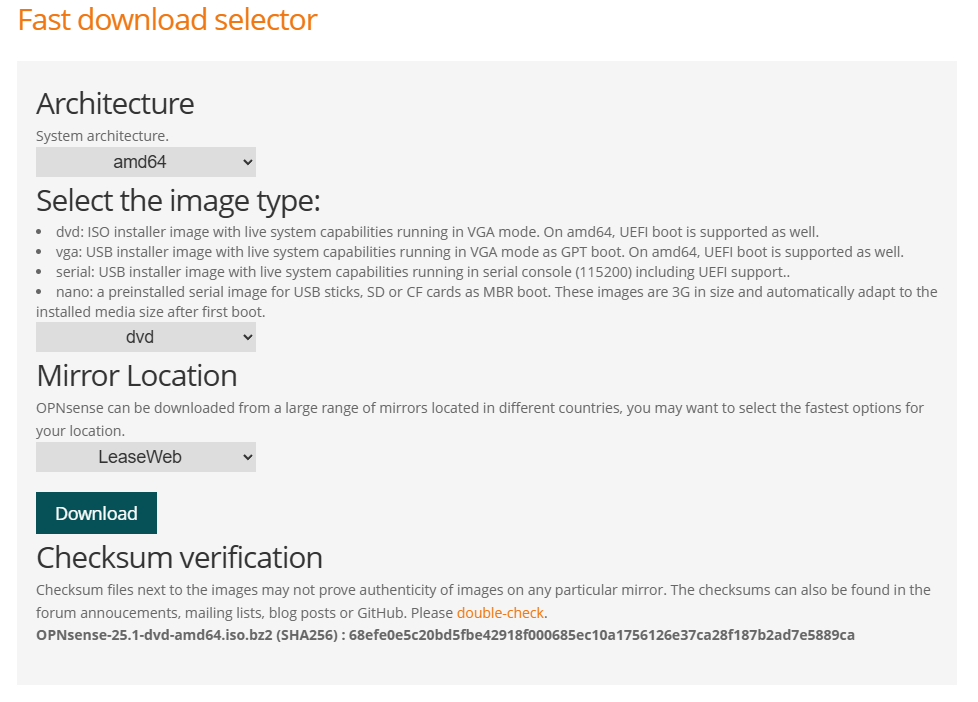
- Copy the URL for the AMD64 DVD image and use "Download from URL" in Proxmox:
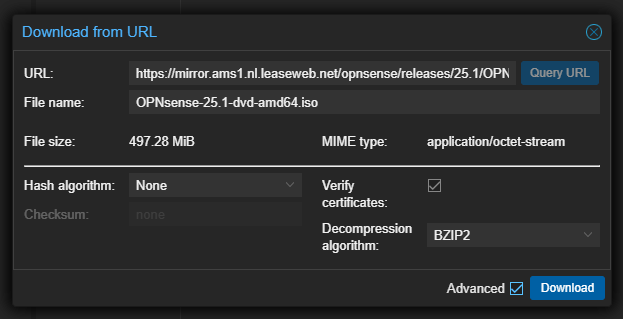
Compression
Proxmox automatically handles the bzip compression of the ISO image - no additional steps required.
- Wait for the download to complete:
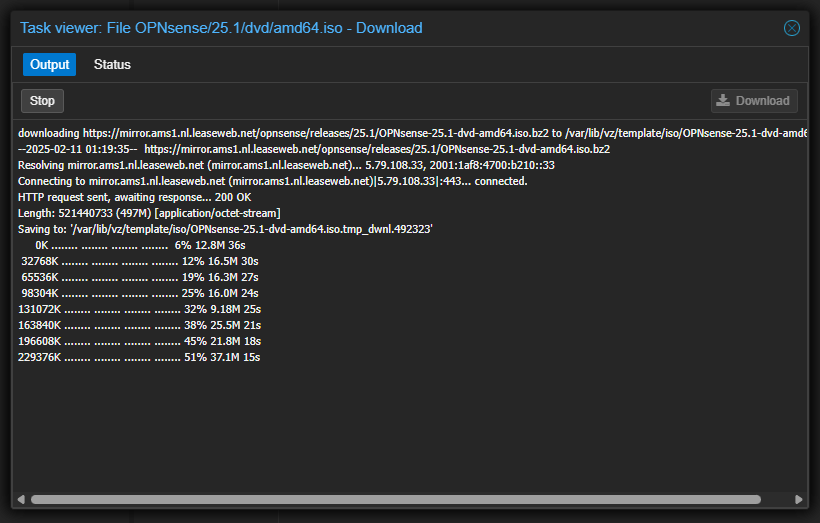
- Verify the download was successful:
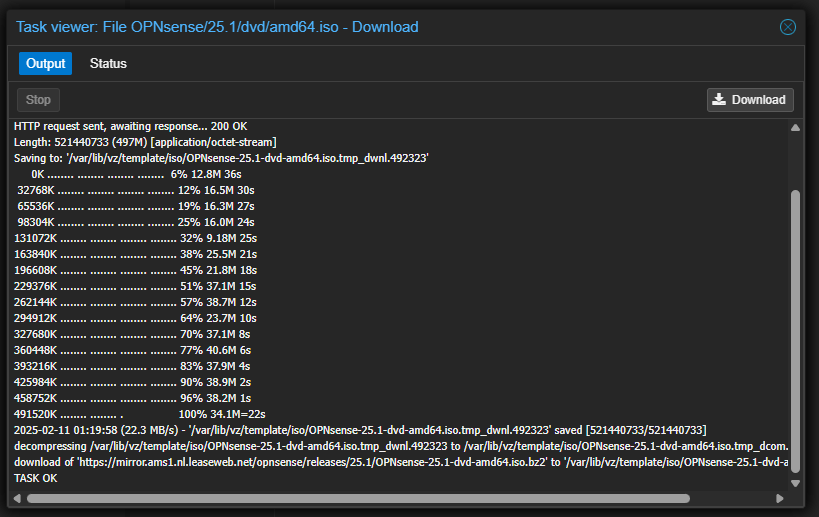
- The ISO will now appear in your ISO Images list:

Option B: Manual Upload
Alternatively, you can download the ISO to your local machine and upload it through the Proxmox web interface.
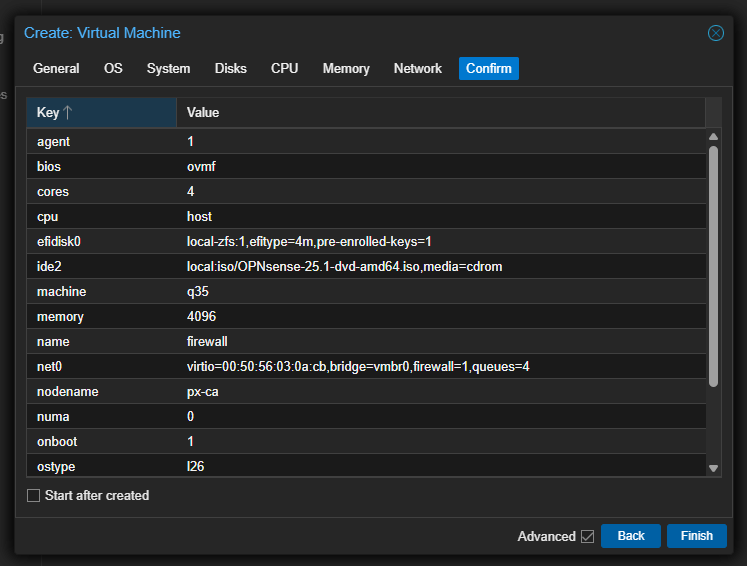
Step 2: Create Virtual Machine
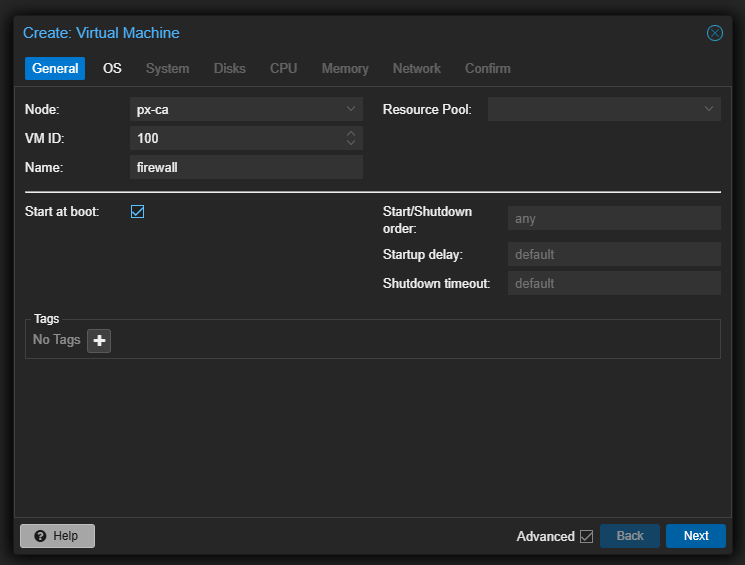
Click "Create VM" in the Proxmox web interface to begin the configuration wizard:

Configuration Steps
1. General Settings
- Name: Choose a descriptive name for your firewall VM
- ✓ Start at boot: Enable for automatic startup
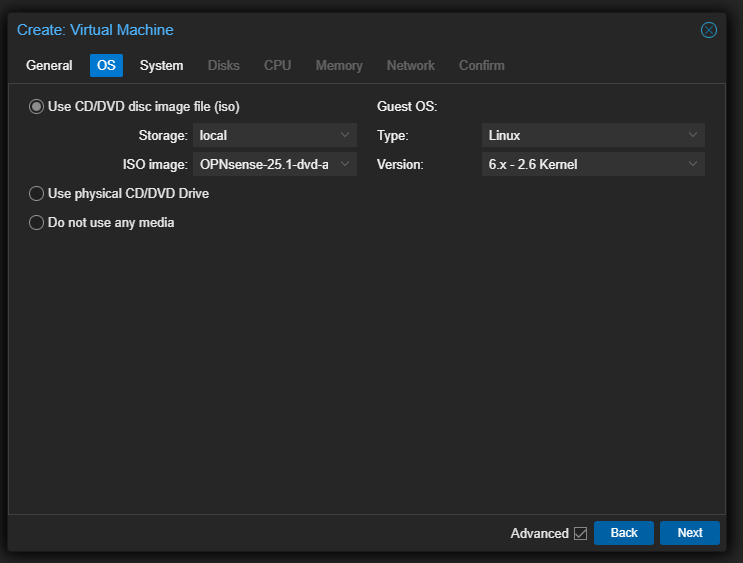
2. OS Configuration
- Attach ISO image
- OS Type: Linux
- Version: Linux kernel 6.x
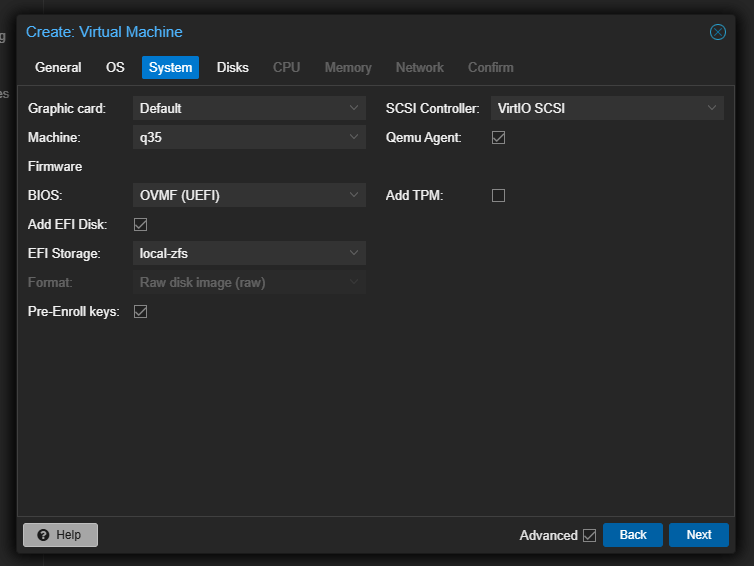
3. System Configuration
Important
These settings are crucial for proper UEFI boot functionality.
Required settings:
- Machine:
q35 - BIOS:
OMVF (UEFI) - ✓ Add EFI Disk
- EFI Storage: Select your primary storage volume
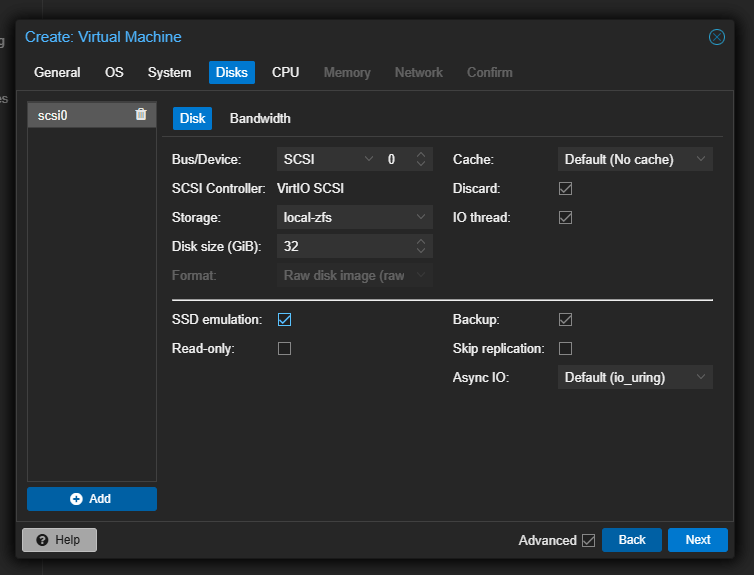
4. Storage Configuration
Disk Size
Choose between 8GB-32GB depending on your needs. Most simple deployments work fine with 8GB.
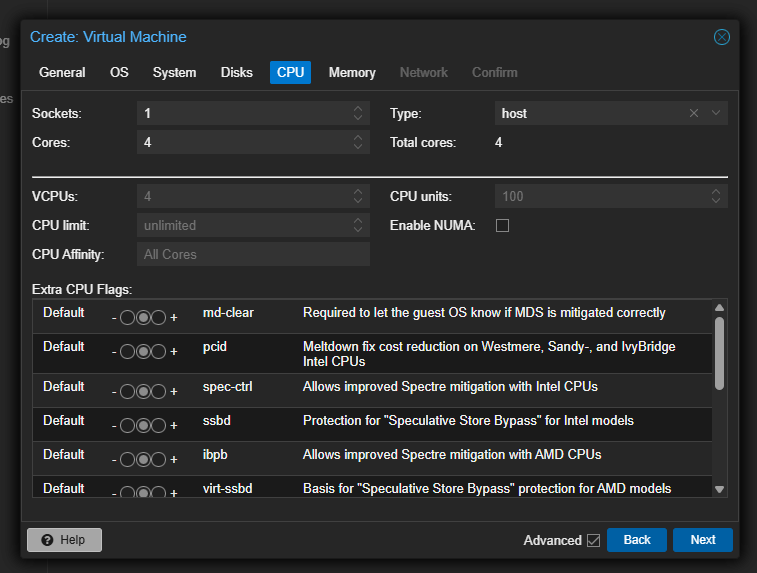
5. CPU Settings
important
Always select host as CPU type to ensure optimal performance and feature availability.
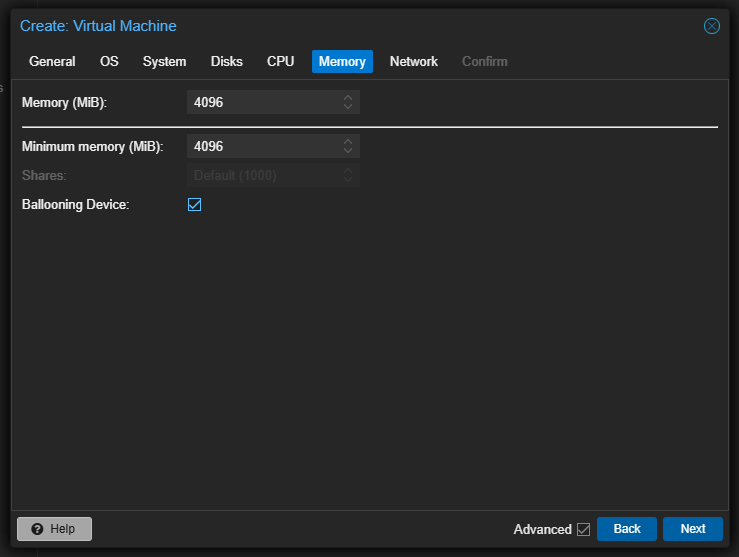
6. Memory Configuration
- Default: 4GB RAM
- Adjust based on your specific requirements and workload
7. Network Configuration
Obtaining Virtual MAC from OVH
- Access OVH Manager and select your additional IP:
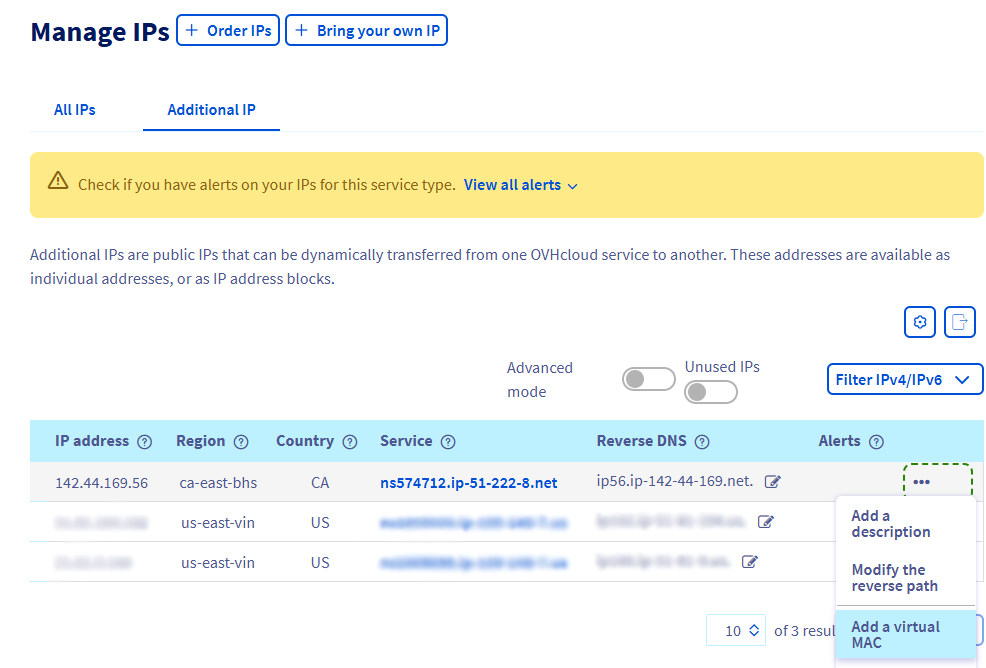
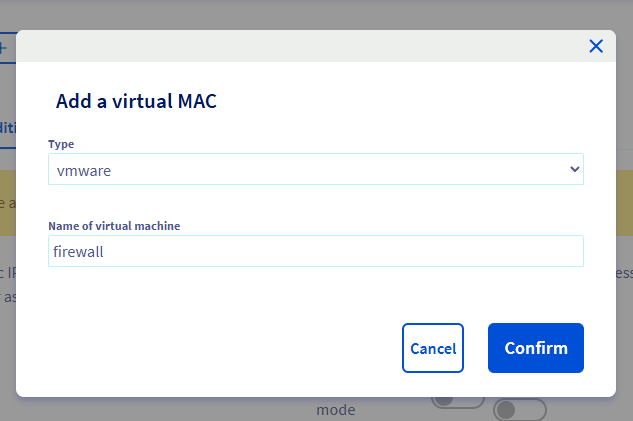
- Add a virtual MAC:
- Type: vmware
- Name: Choose descriptive identifier
- Wait for confirmation:

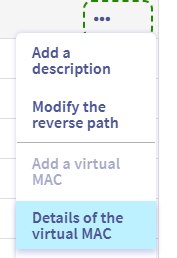
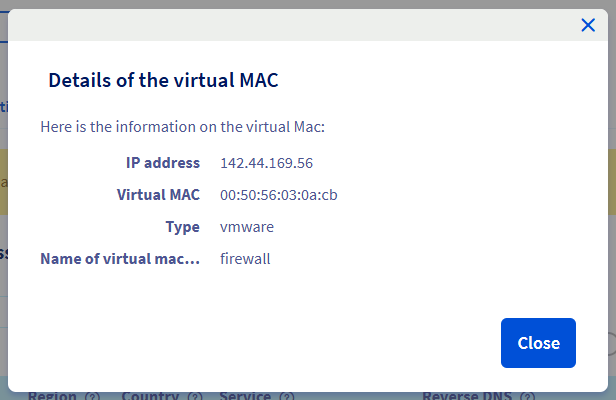
- View the virtual MAC details:
- Copy the MAC address for use in Proxmox:
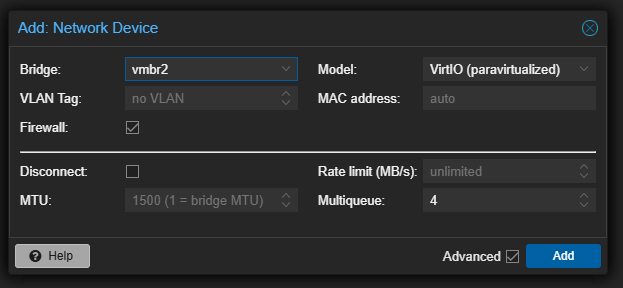
WAN Interface Setup
Apply the Virtual MAC to WAN interface in Proxmox:
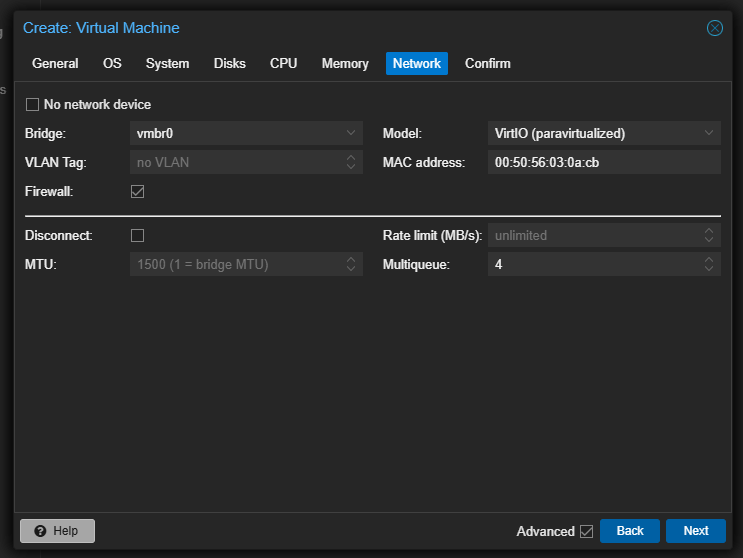
Set multiqueue to 4 or 8 for better performance (depends on your core count)
WARNING
Disable "Start after creation" and add LAN interface first
LAN Interface Setup
- Select VM in Proxmox
- Navigate to Hardware
- Click "Add" → "Network Device":

- Configure as LAN bridge and set appropriate multiqueue value:
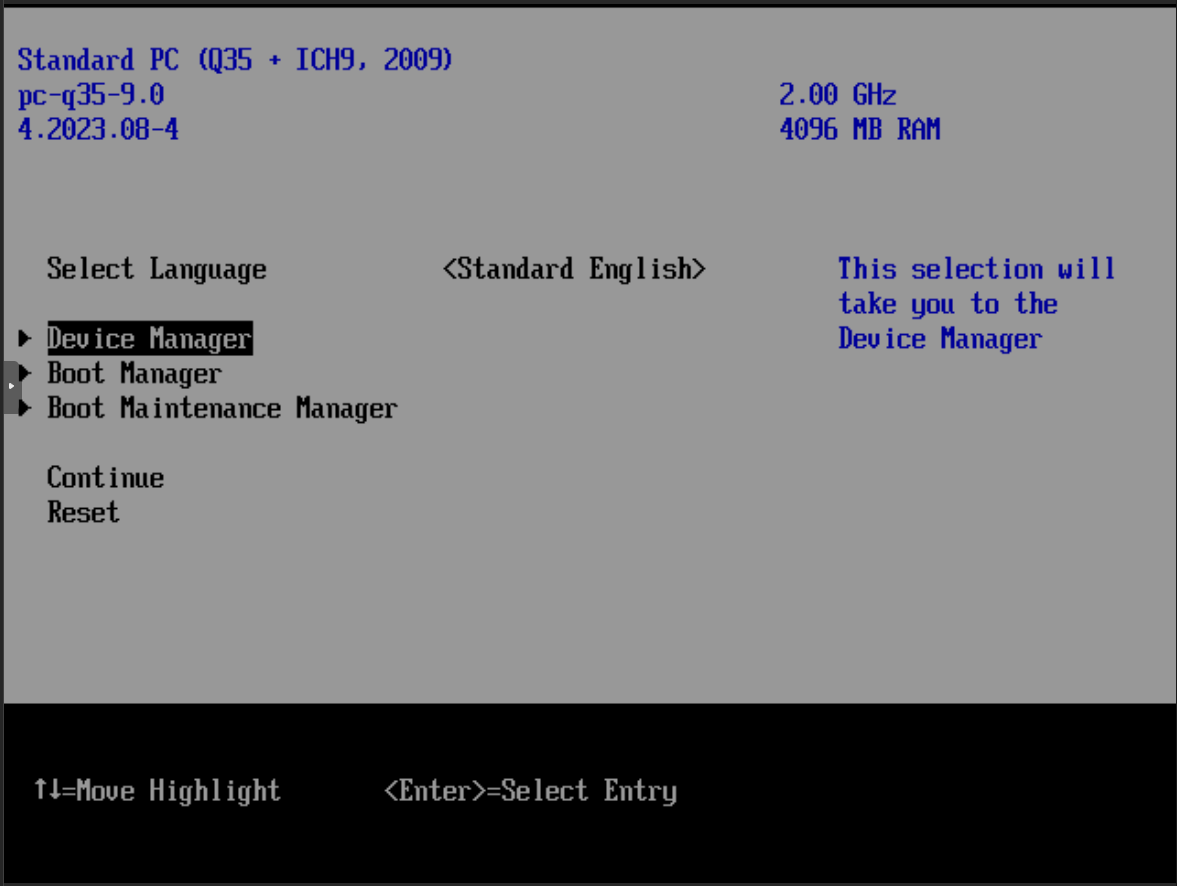
Step 3: Initial Boot Configuration
UEFI Configuration
Required Step
Secure Boot must be disabled for the OPNSense ISO to boot properly.
- Start VM and press F2 repeatedly to enter BIOS:

Navigate through BIOS:
- Select "Device Manager":
- Choose "Secure Boot Configuration":
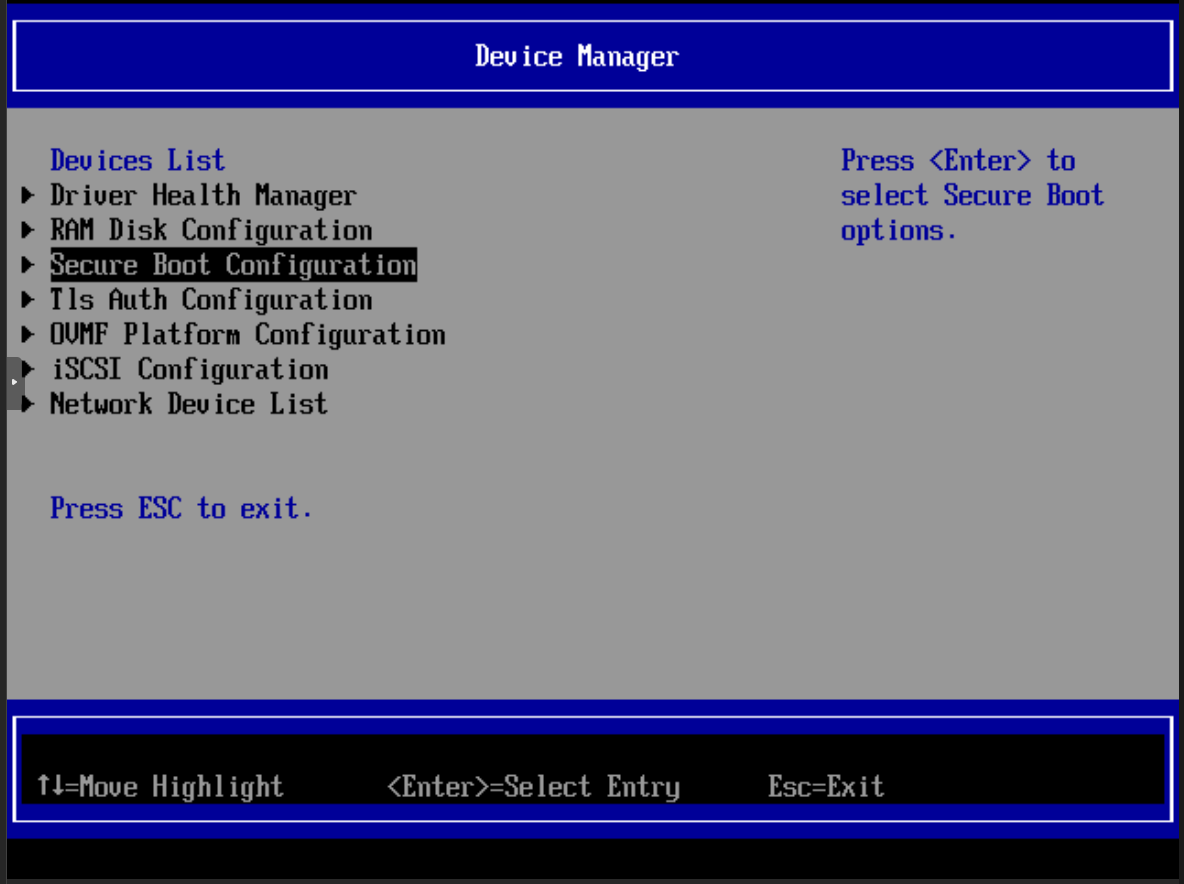
- Disable "Attempt Secure Boot":
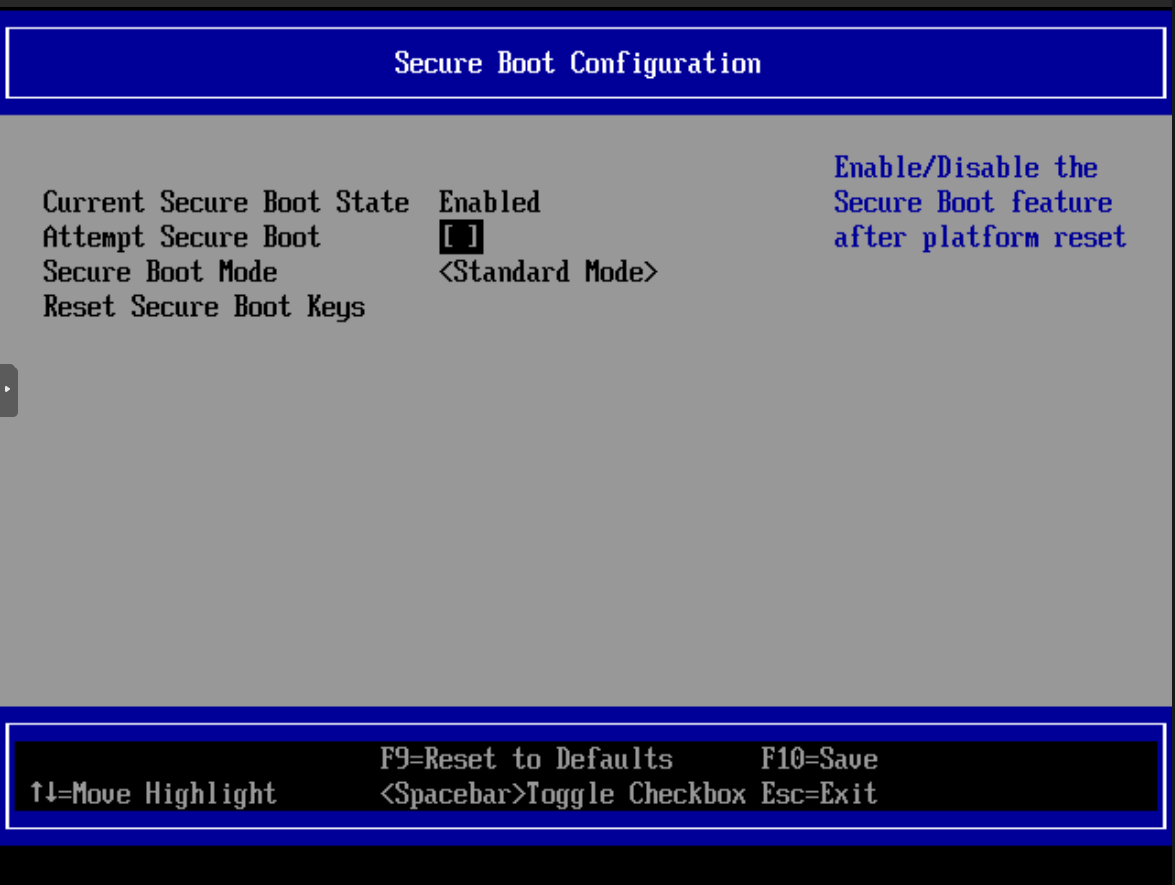
Save and Exit (F10)
Boot Process
After configuring UEFI, the system will boot to the OPNSense installer:
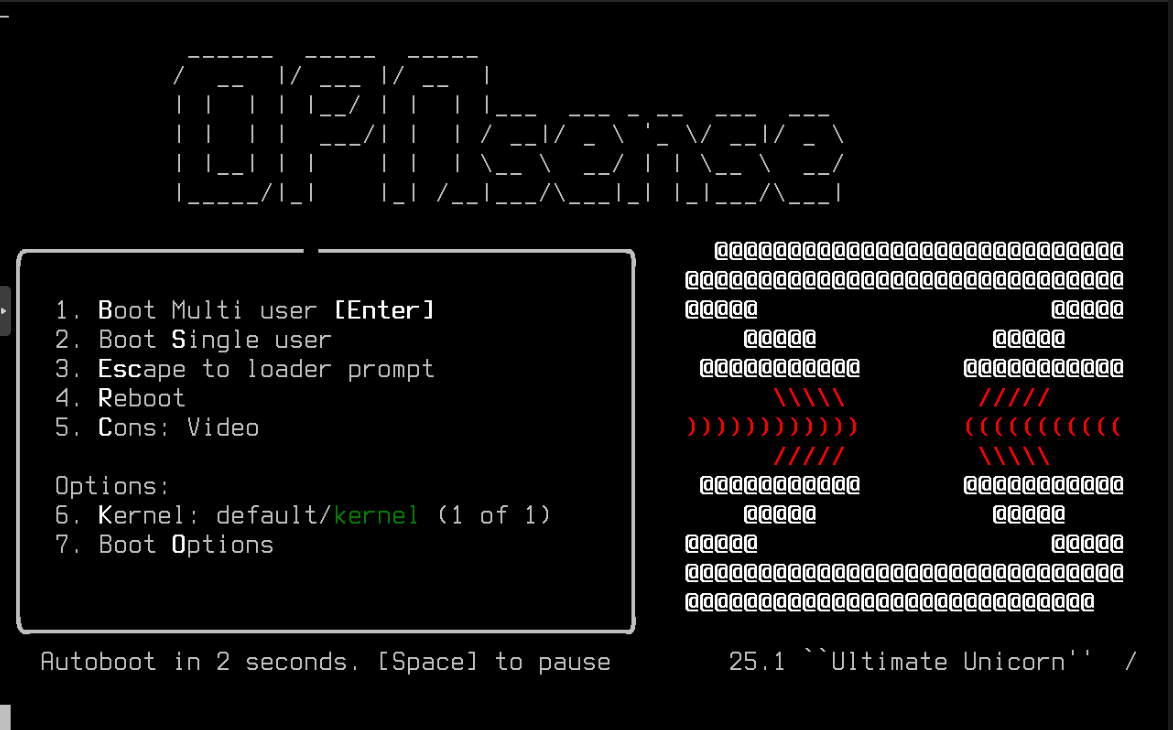
Wait for the boot process to complete:

Next Steps
Continue to the next section for OPNSense installation and initial configuration.