
Initial Configuration
After successfully installing OPNSense, you'll need to perform some initial configuration to get your firewall operational. This guide walks you through:
- Configuring network interfaces
- Setting up IP addresses
- Accessing the Web UI
- Completing initial setup
Network Interface Configuration
Step 1: Assign Interfaces
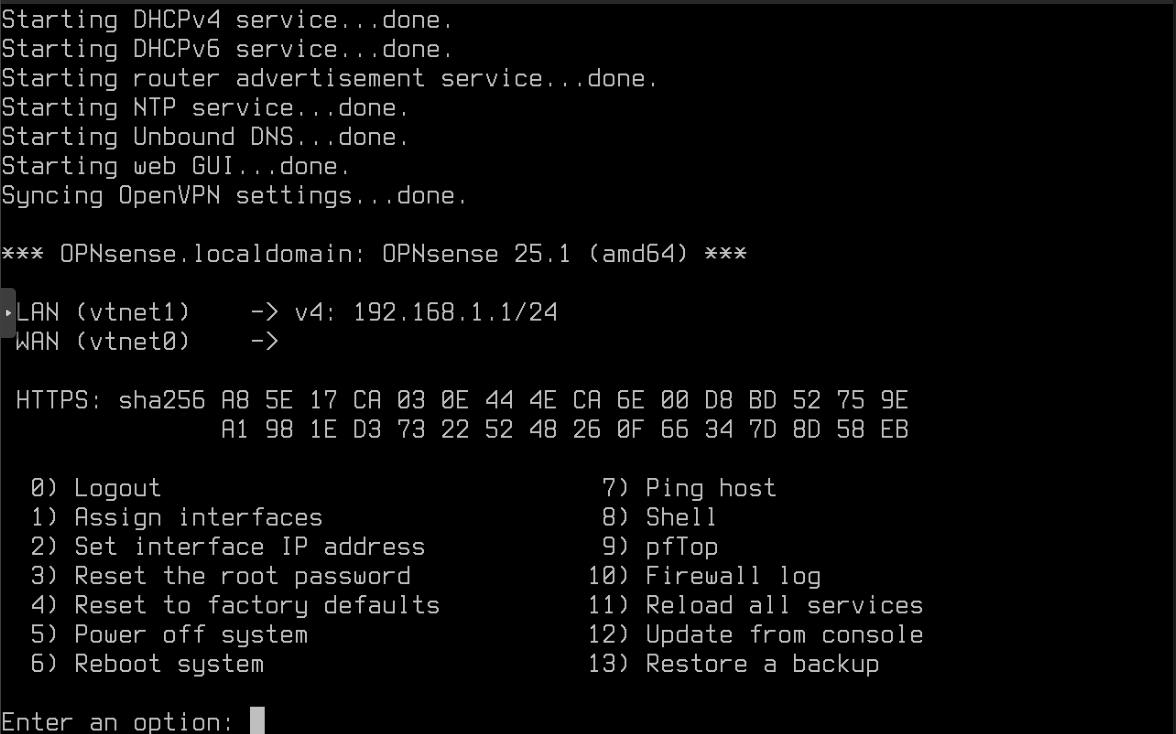
- Log in to the console with your credentials:
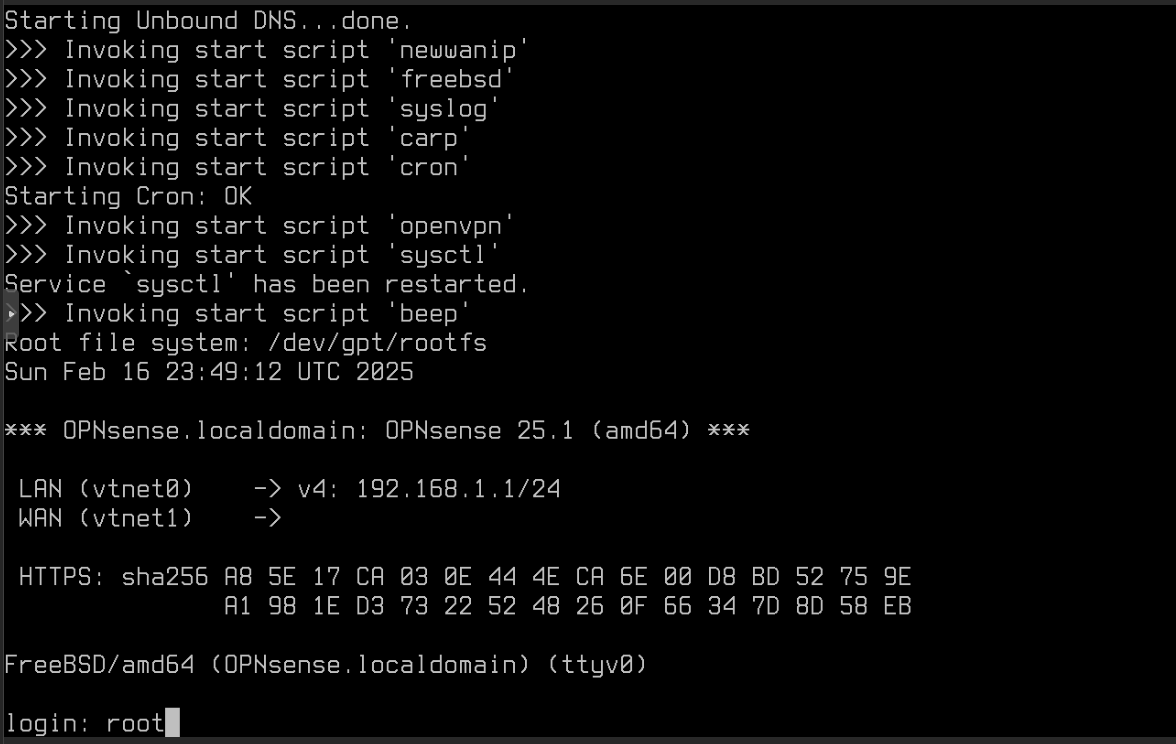
- You'll see the main configuration menu:

Select option
1to assign interfacesWhen prompted about LAGGs or VLANs, choose
no:

- You'll see a list of available interfaces. Note that
vtnet0will be your WAN interface - you can verify this by matching the MAC address with your OVH IP Virtual MAC:
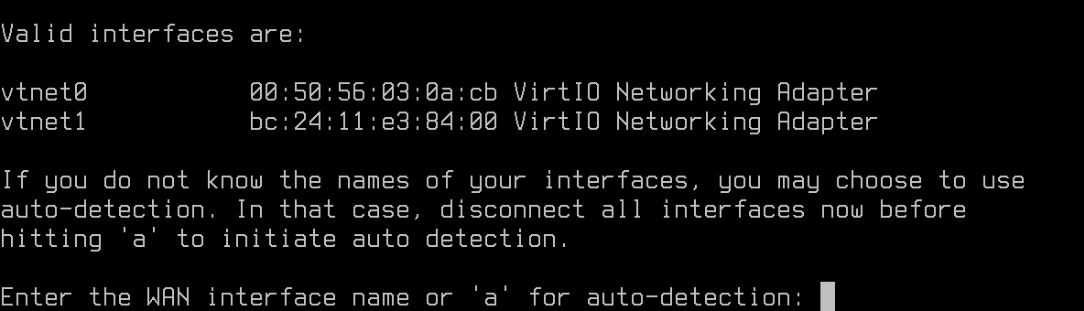
- Assign the WAN interface by entering
vtnet0:

- Assign the LAN interface by entering
vtnet1:

- Press Enter without typing anything to skip the optional interface:
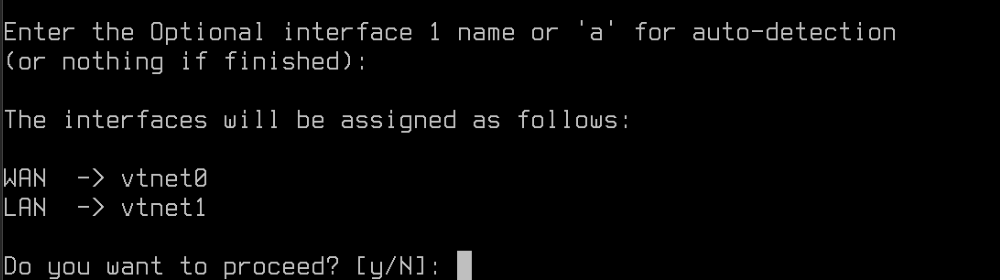
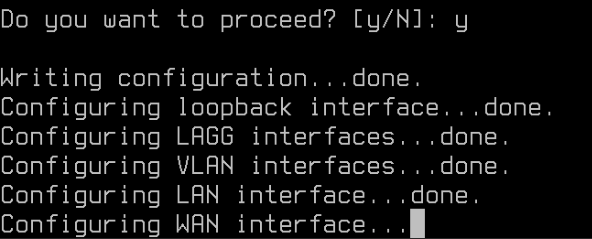
- Confirm the configuration by entering
y:
Step 2: Configure IP Addresses
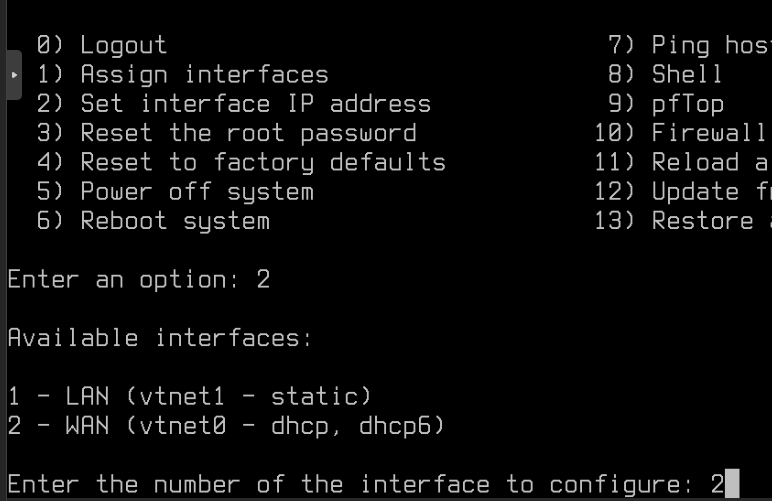
From the main menu, select option 2 to set interface IP addresses:
Configure LAN Interface
- You'll see a list of available interfaces:
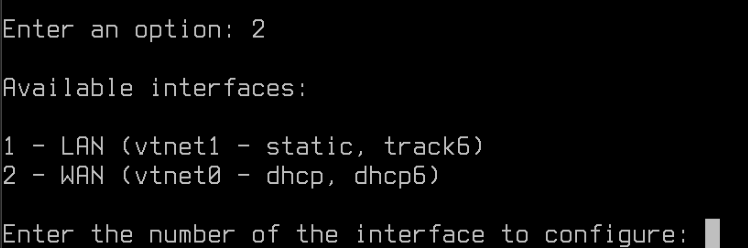
- Select the LAN interface and configure its IP address:
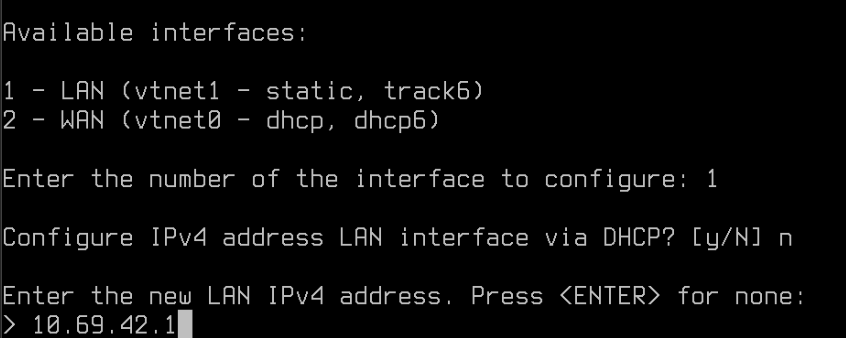
- Enter your desired LAN IP configuration:
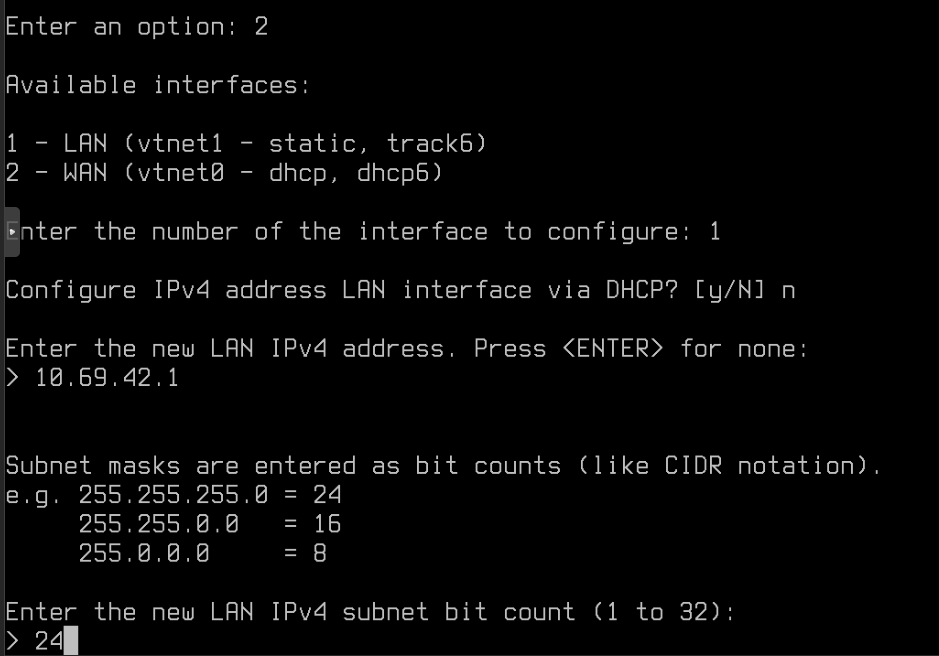
- Complete the LAN configuration:
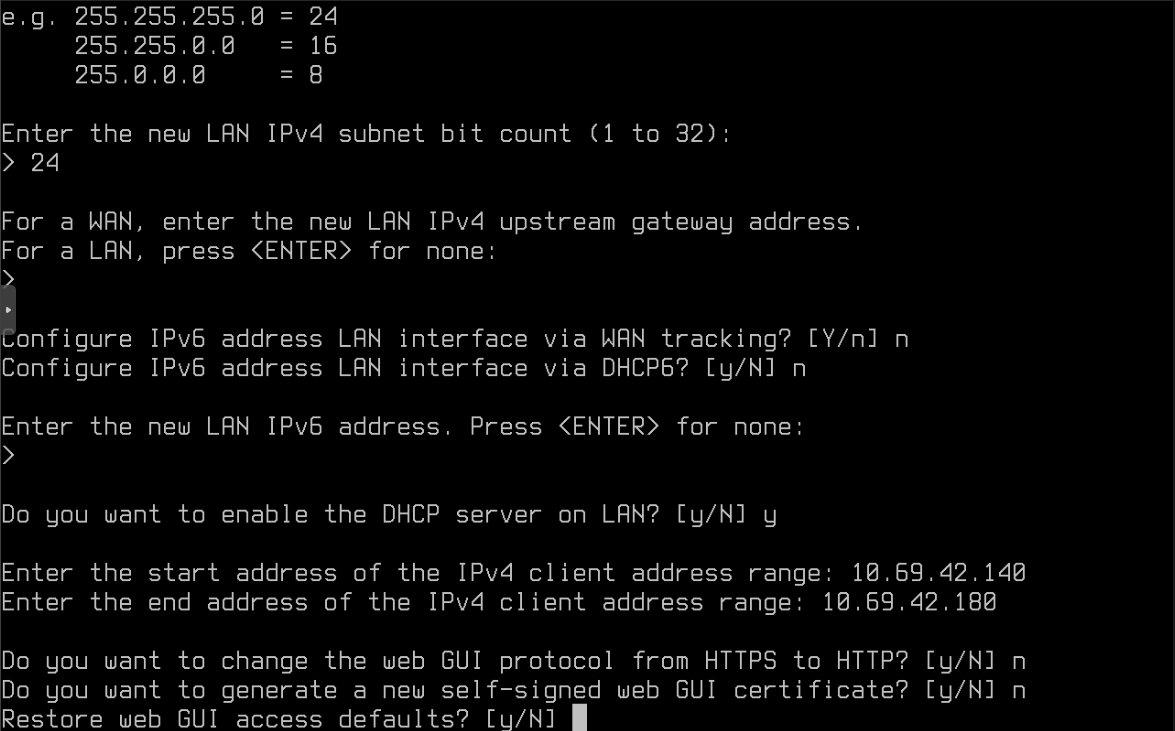
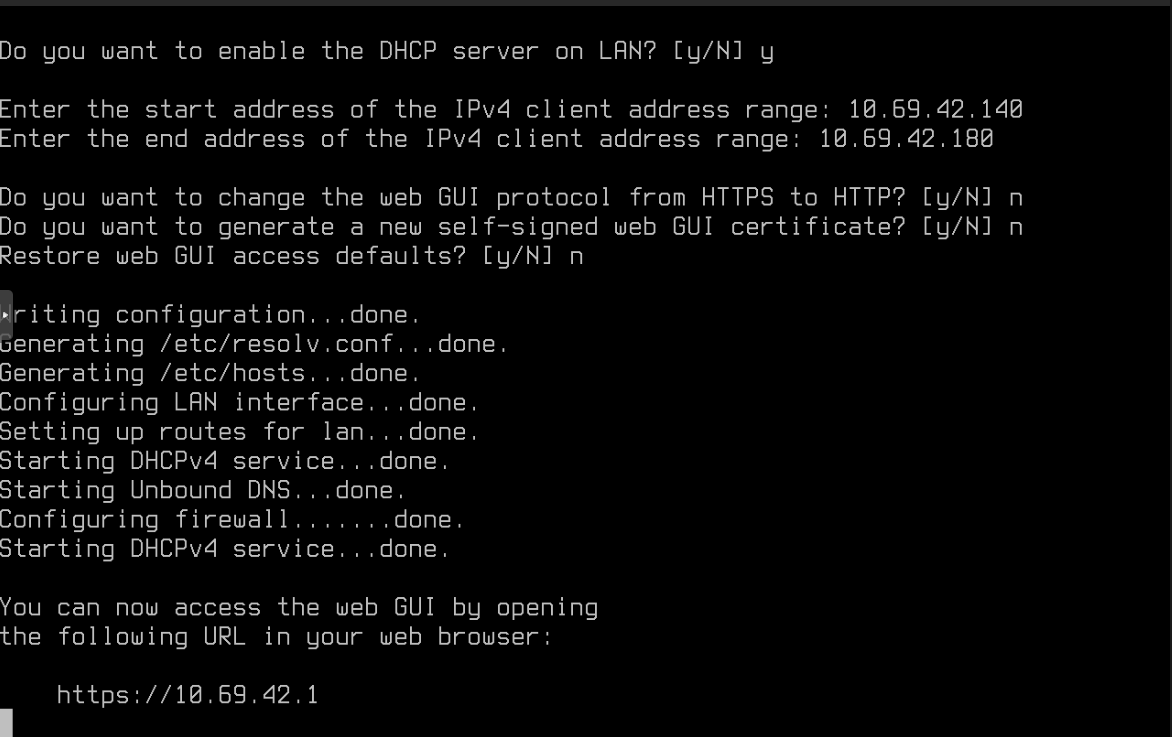
- Verify the LAN configuration is complete:
Configure WAN Interface
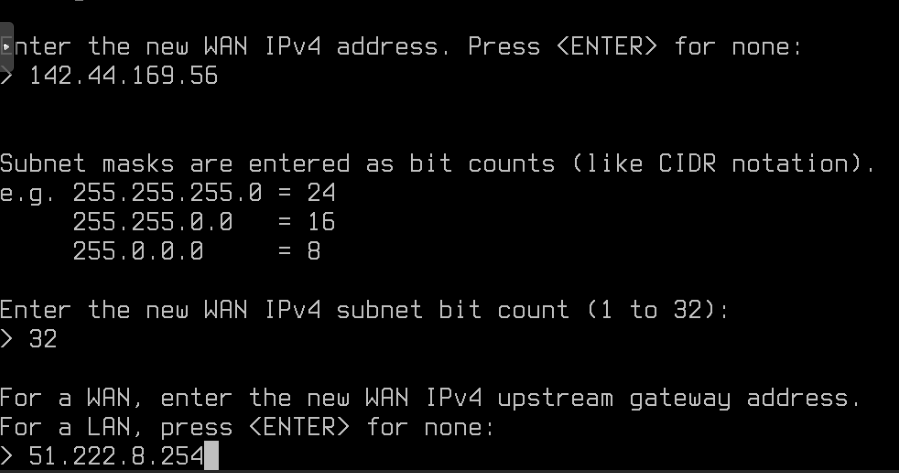
- Select the WAN interface:
- For the WAN gateway, use your OVH server's gateway address:
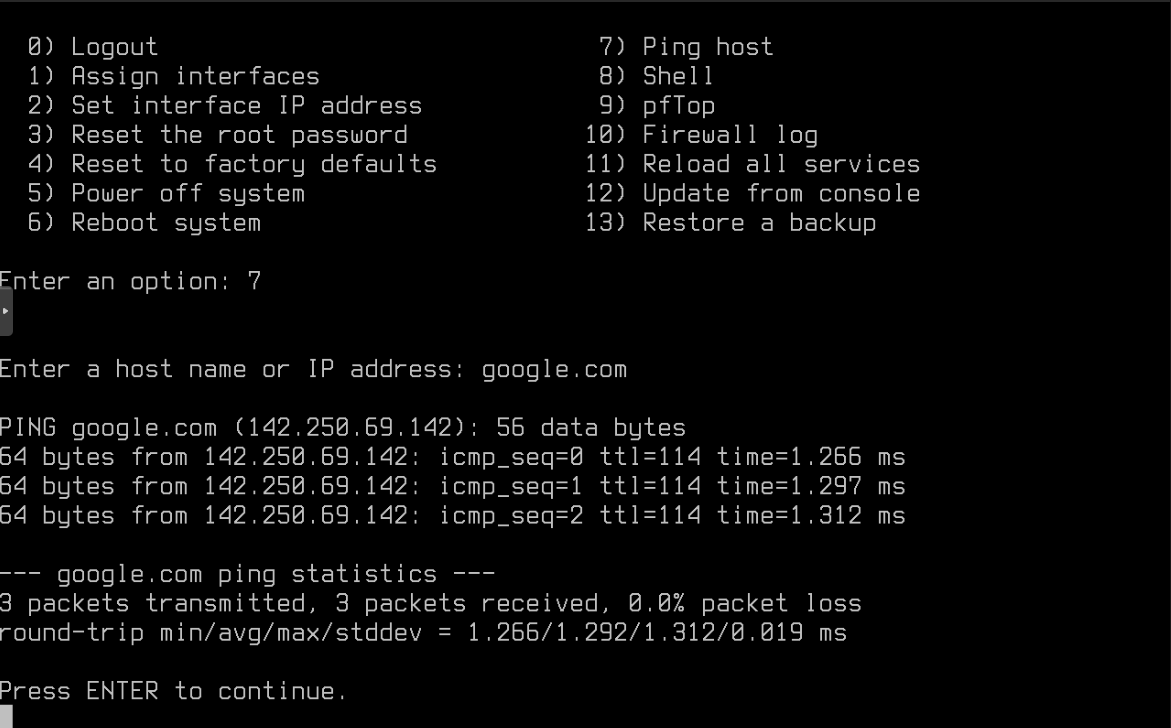
- Test your network connection to verify everything is working:
Web UI Access
WARNING
Initial Web UI access isn't possible directly from WAN as there are no firewall rules configured yet, and nothing exists on the LAN segment.
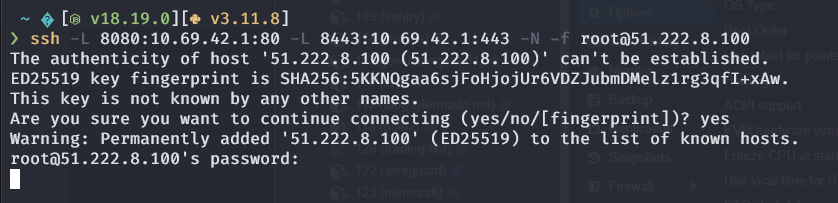
Option 1: SSH Port Forwarding (Recommended)
Use SSH port forwarding to access the Web UI:
ssh -L 8080:10.69.42.1:80 -L 8443:10.69.42.1:443 -N -f user@remote-serverConfiguration
Replace:
10.69.42.1with your firewall's IP addressuser@remote-serverwith your Proxmox host credentials (typicallyroot@your-proxmox-host-ip)
This creates local port forwards:
- Port 8080 → Firewall HTTP (80)
- Port 8443 → Firewall HTTPS (443)
Option 2: LAN VM Access
Alternatively, you can:
- Create a new VM with GUI
- Attach it to your LAN interface
- Access the WebUI through this VM
Initial Web UI Setup
- Access the Web UI at https://localhost:8443:
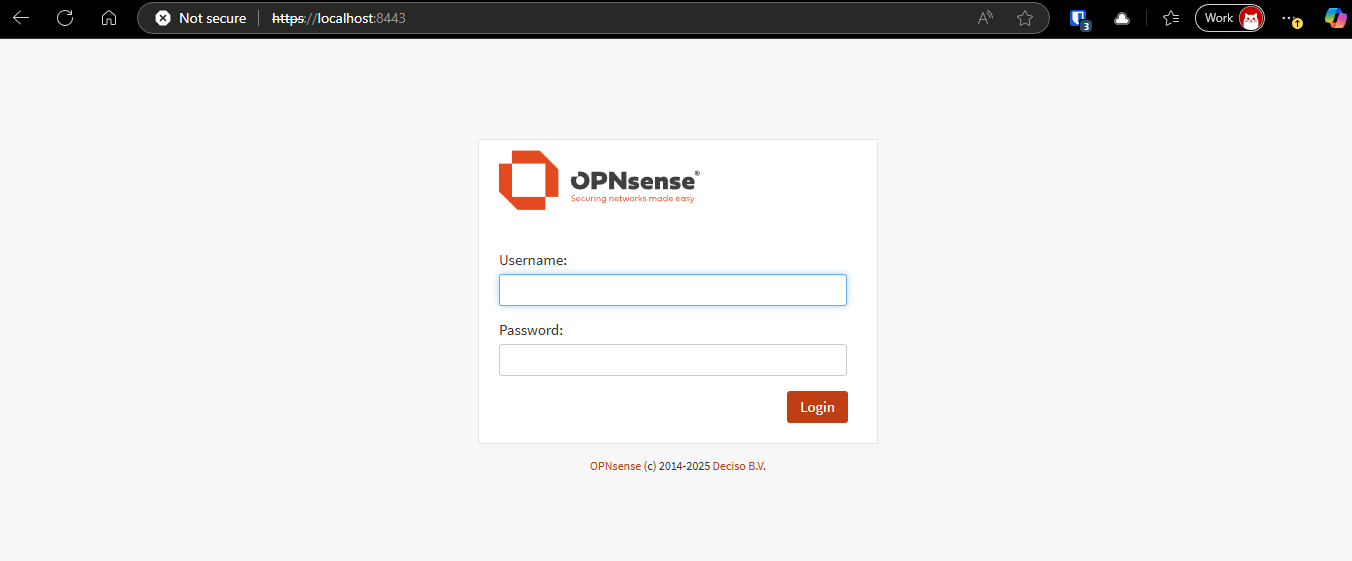
Log in with:
- Username:
root - Password: The one you set during installation
- Username:
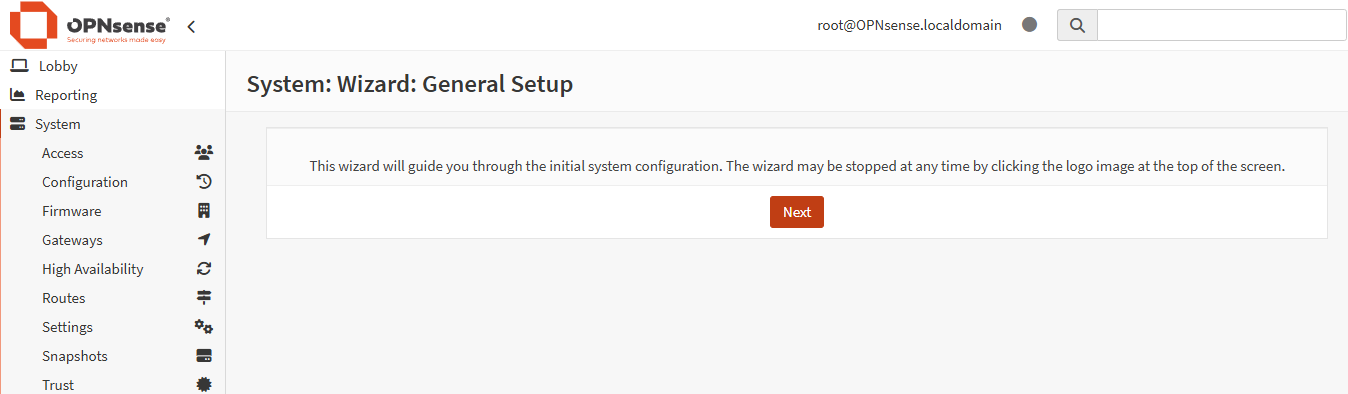
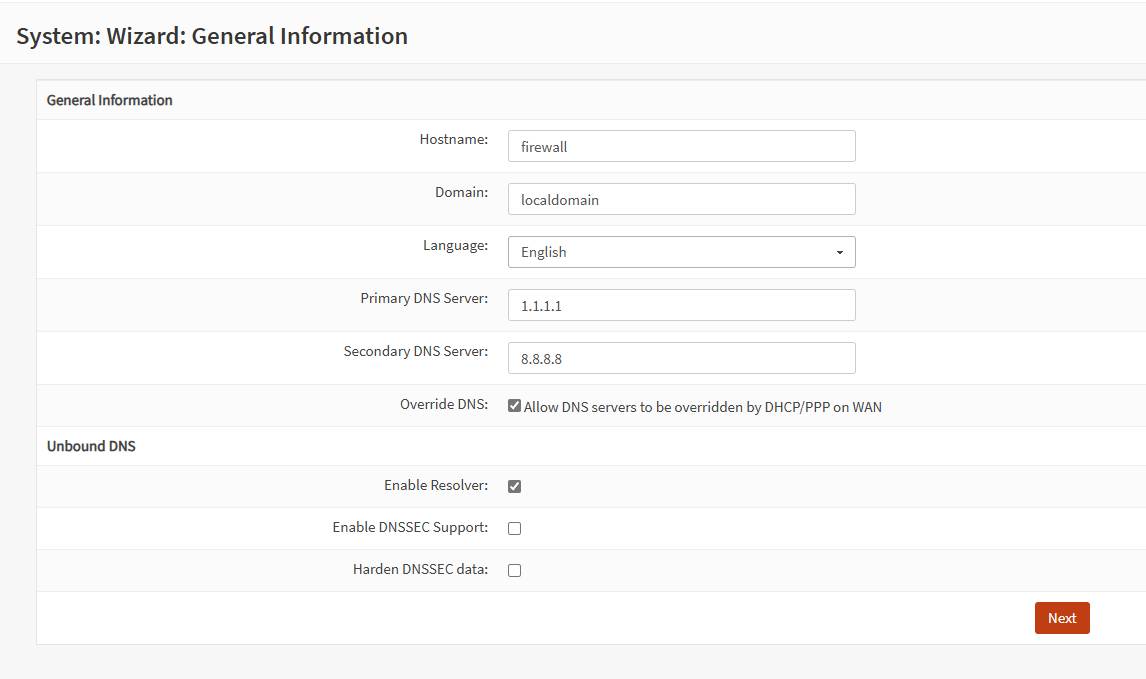
Complete the Getting Started wizard:
- Configure basic system settings:
- Hostname
- Domain
- DNS servers
- Other general preferences
- Review the configuration summary:

Final Configuration Check
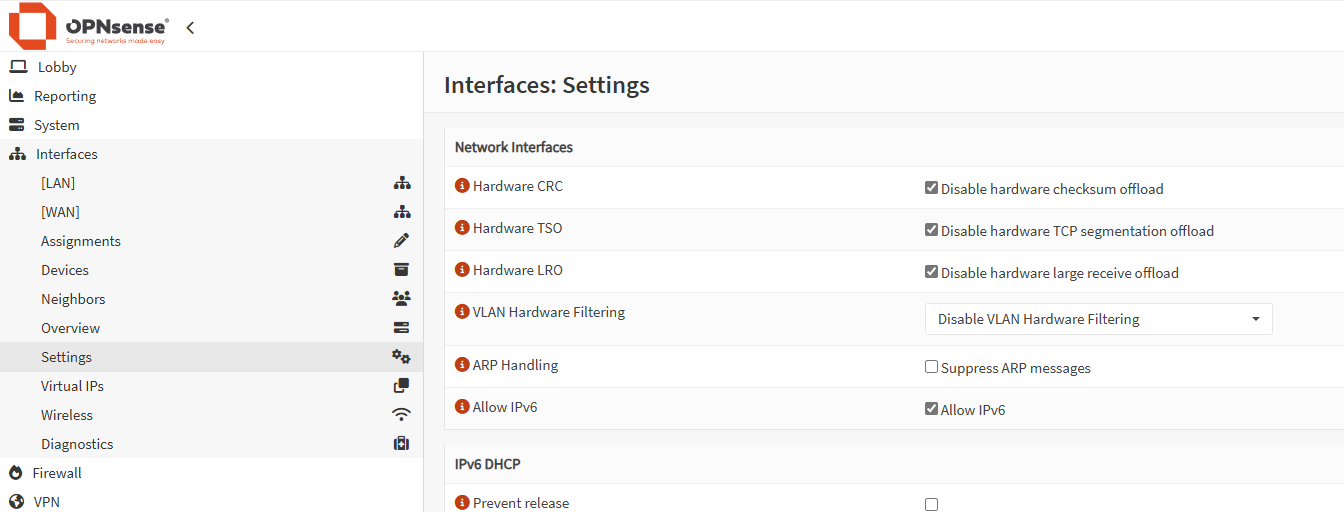
Hardware Offloading
TIP
These settings should be disabled by default when using virtio. If not, disable them manually:
Completion
Your firewall should now have a working baseline configuration. You can access the dashboard to monitor your system:

Next Steps
From here, you can:
- Configure firewall rules
- Set up VLANs
- Add additional security features
- Configure VPN access
- And more...